How To Clean a Vaporizer: Step-by-Step Guide
Definition
How to clean a vaporizer is a straightforward maintenance routine that keeps your device tasting fresh, drawing smoothly, and lasting years longer than a neglected one. Research confirms vaporizers produce fewer harmful byproducts than combustion (Pomahacova et al., 2009), but residue build-up in the vapour path undermines that advantage. This guide covers the full cleaning process for both portable and desktop dry-herb devices.
Why Cleaning Your Vaporizer Actually Matters
How to clean a vaporizer is a straightforward maintenance routine that keeps your device tasting fresh, drawing smoothly, and lasting years longer than a neglected one. A dirty vaporizer doesn't just taste grim — it actively works against you. Resin builds up in the vapour path, restricting airflow and forcing the heating element to work harder. The result? Weaker draws, muted flavour, and a device that dies years before it should. A 2016 study published in Scientific Reports confirmed that vaporizers produce significantly fewer harmful byproducts than combustion (Pomahacova et al., 2009), but that advantage shrinks when you're pulling air through a caked-on layer of old residue. Data from the EMCDDA's drug profiles archive indicates that vapour delivery systems offer a reduced-risk alternative to smoking when devices are properly maintained. Keeping your device clean is the single easiest way to protect both the hardware and the quality of your sessions.
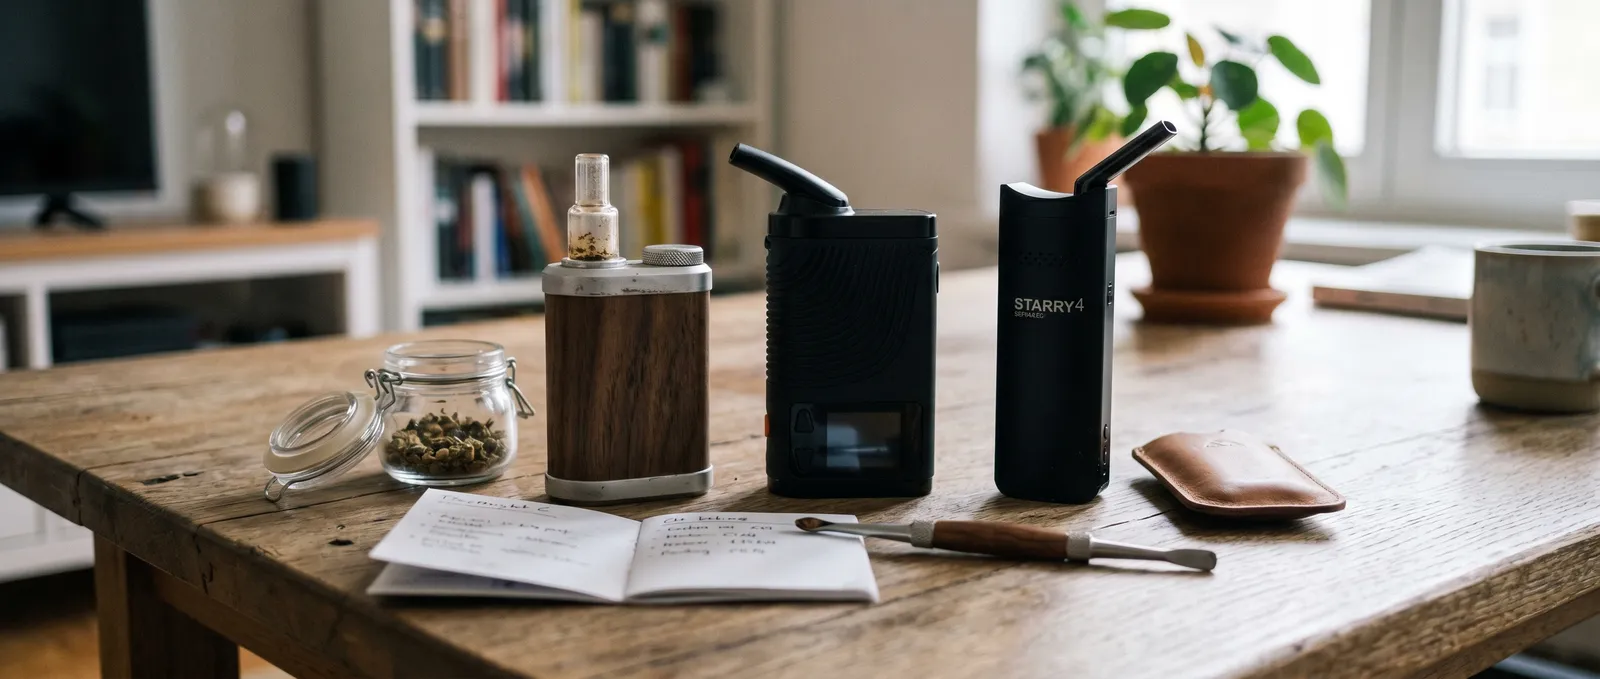
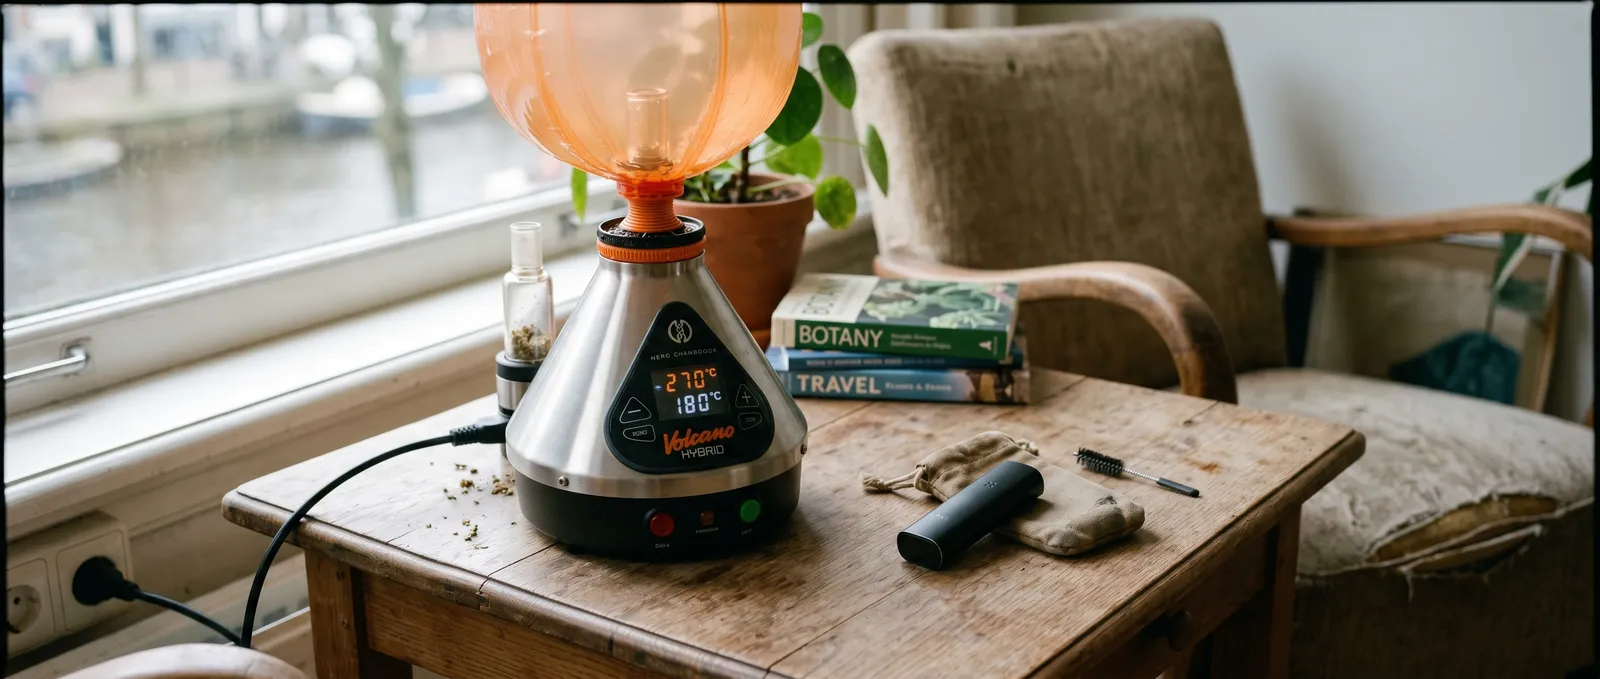
This guide walks through a complete cleaning routine for dry-herb vaporizers — portables like the Crafty, Mighty, PAX 3, Arizer Solo, and DaVinci IQ2, as well as desktop units like the Volcano and Arizer Extreme Q. If you want to learn how to clean a vaporizer properly, the principles overlap across form factors, but each has its quirks. We'll cover what you need, how often to clean a vaporizer, and the mistakes that send people back to the shop for replacement parts. You can buy replacement screens, O-rings, and brush kits from most specialist retailers to keep everything on hand.
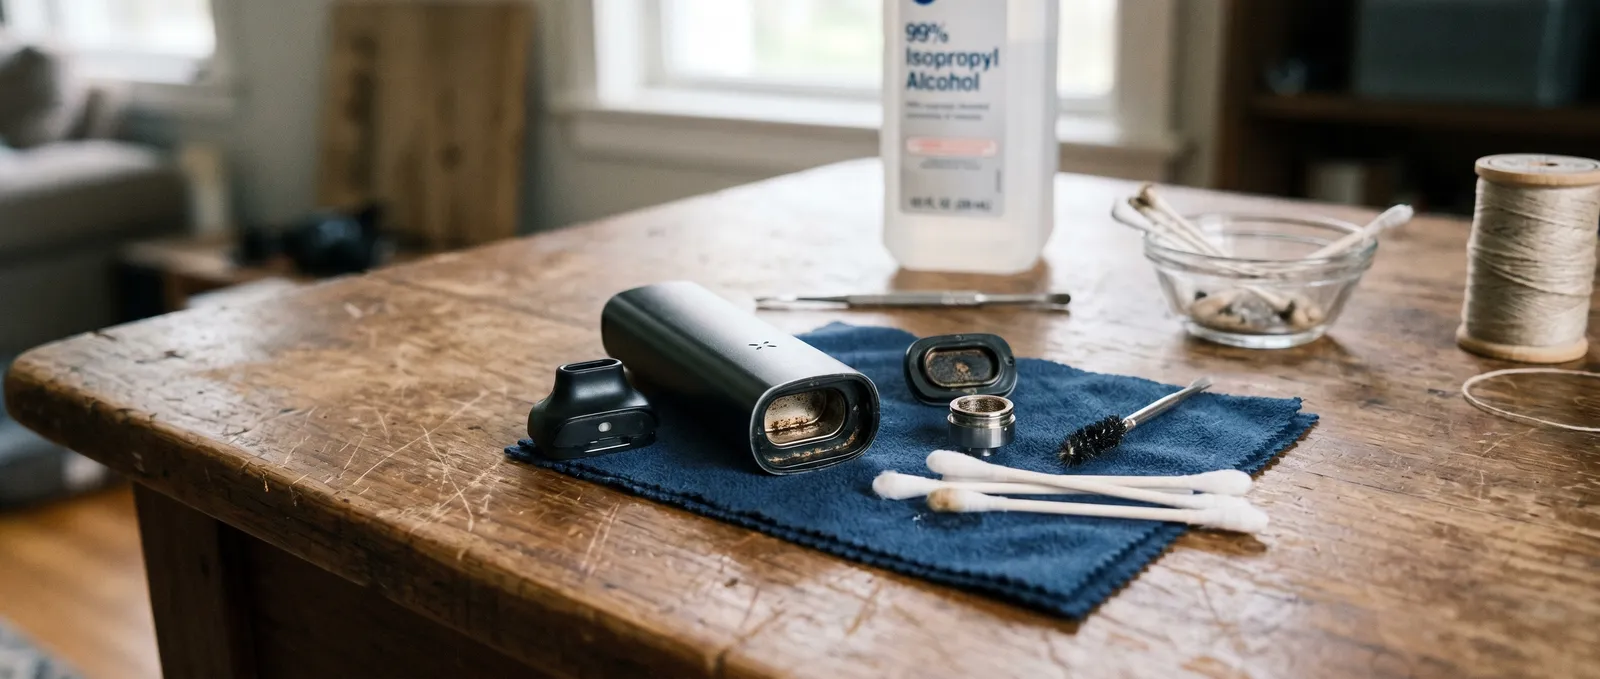
What You Need Before You Start
The essential supplies for learning how to clean a vaporizer fit in a single drawer. Gather everything first. Stopping mid-clean to hunt for a cotton bud in a bathroom drawer while your mouthpiece soaks in a bag is annoying and avoidable.
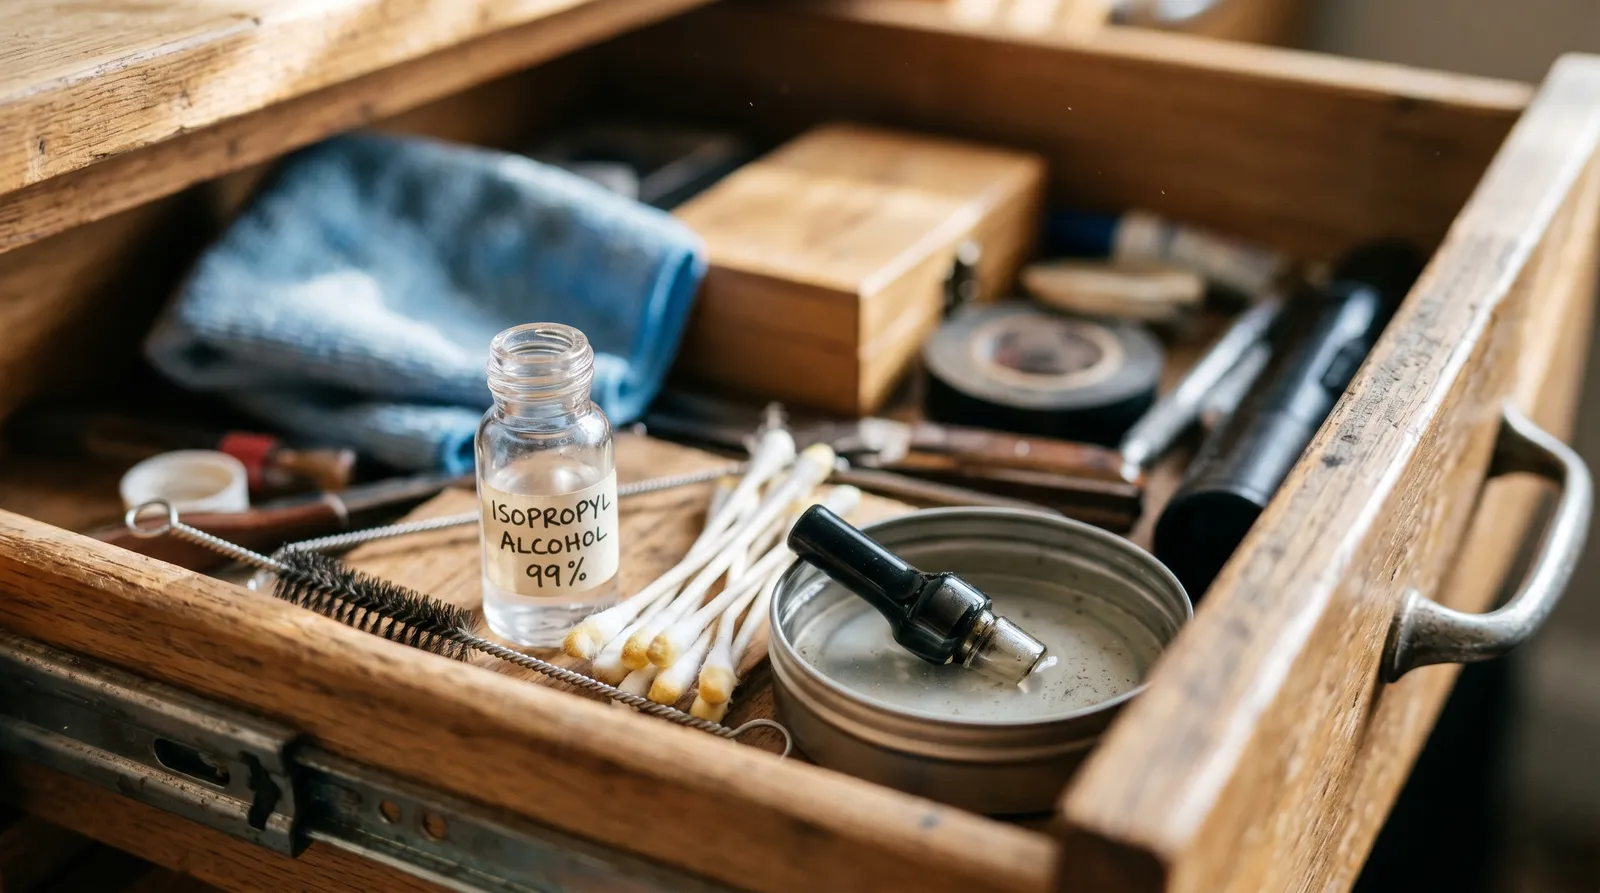
- Isopropyl alcohol (90% or higher) — the workhorse. Lower concentrations contain more water, which means longer drying times and streaky residue. 99% is best for metal and glass parts.
- Cotton buds (Q-tips) — standard and pointed-tip varieties. You'll go through more than you expect.
- Pipe cleaners — flexible enough to snake through vapour paths and stems.
- A small resealable bag or container — for soaking removable parts.
- Paper towels or a lint-free cloth — for drying and wiping down exteriors.
- A soft-bristle brush — most portables ship with one. If you've lost yours, a clean, dry paintbrush works. You can buy replacement brush kits from most headshop suppliers.
One thing to flag: never use isopropyl alcohol on plastic or rubber components unless the manufacturer explicitly says it's safe. Iso can degrade seals, gaskets, and certain plastics over time. Warm soapy water is the safer option for those parts. And always clean in a well-ventilated space — iso fumes in a small bathroom aren't pleasant, and the vapour is flammable near heat sources.
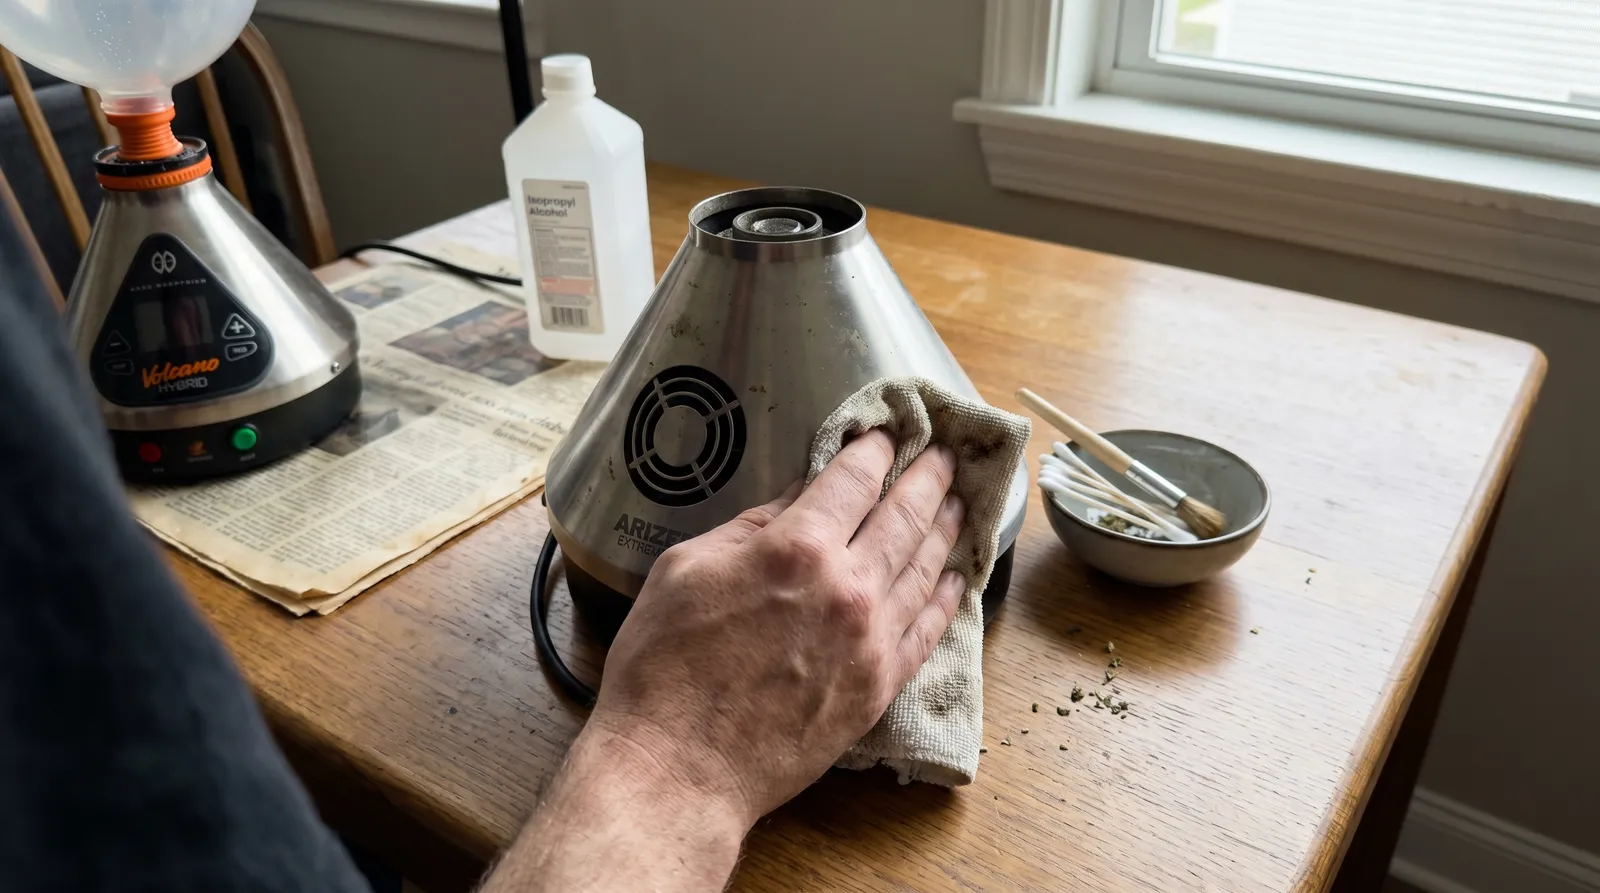
Step 1 — Cool Down and Empty the Chamber
Always let your vaporizer cool completely before touching internal components — at least 10 minutes after your last session. This sounds obvious, but impatience here leads to burns and to pushing softened resin deeper into crevices rather than lifting it out.
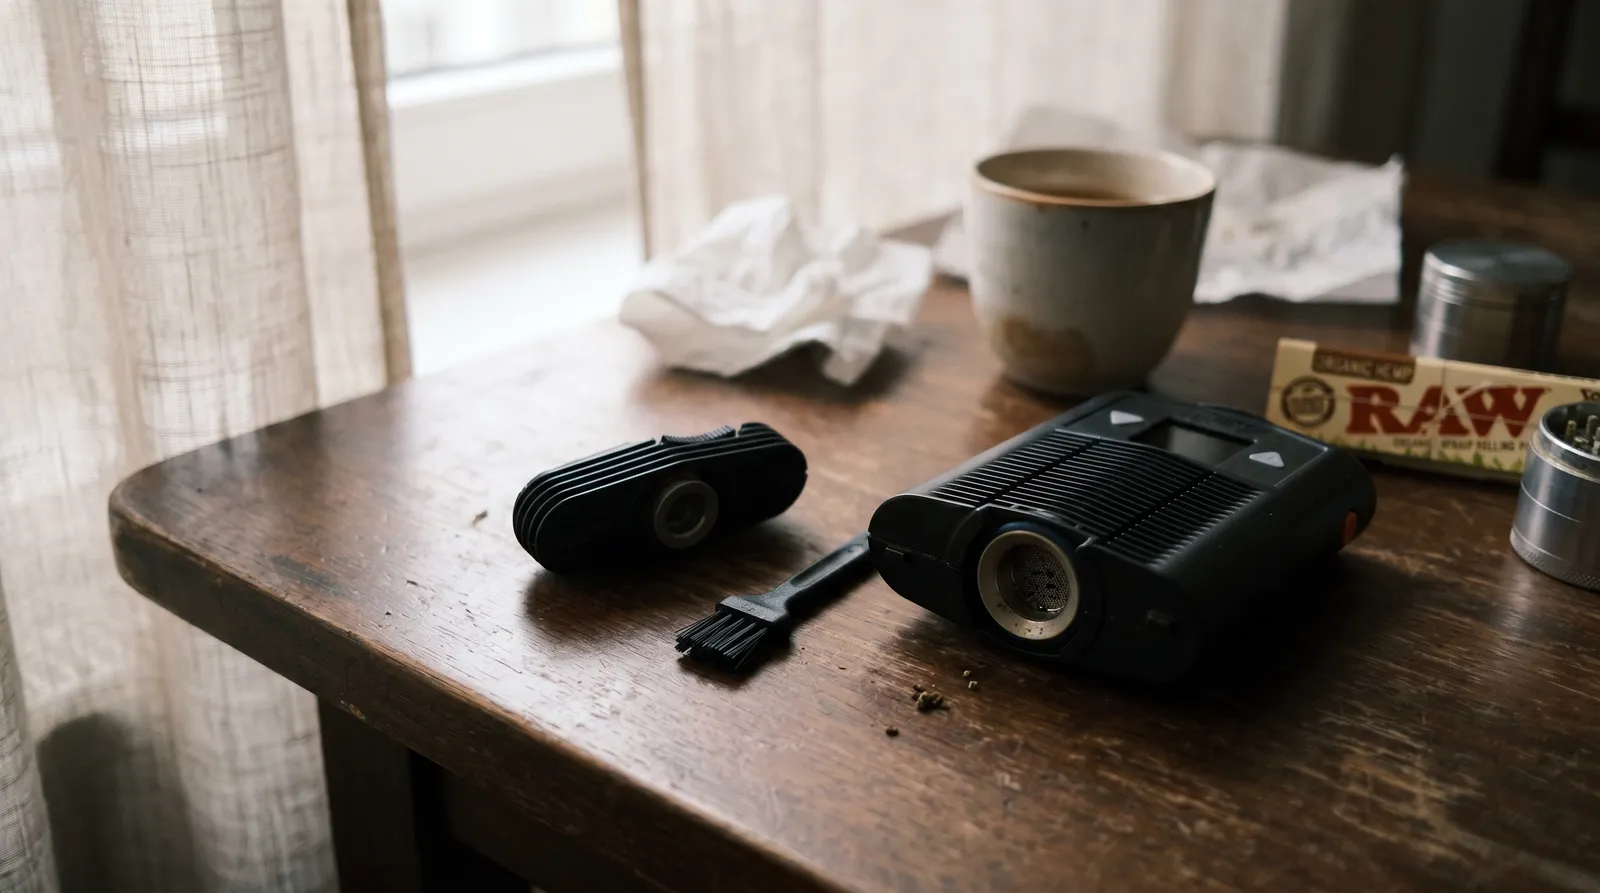
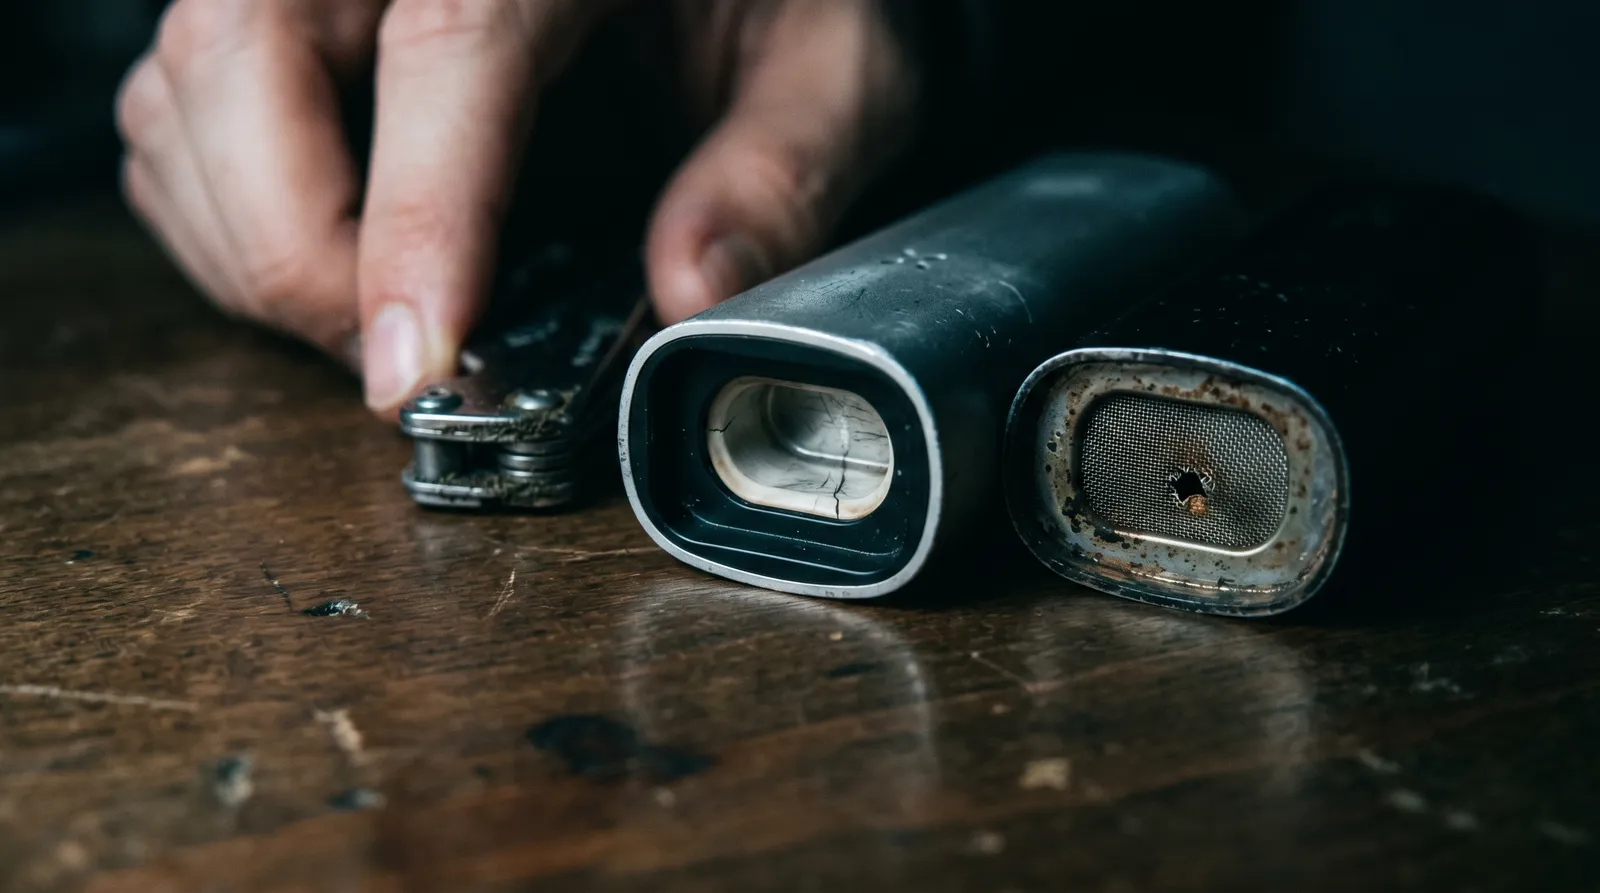
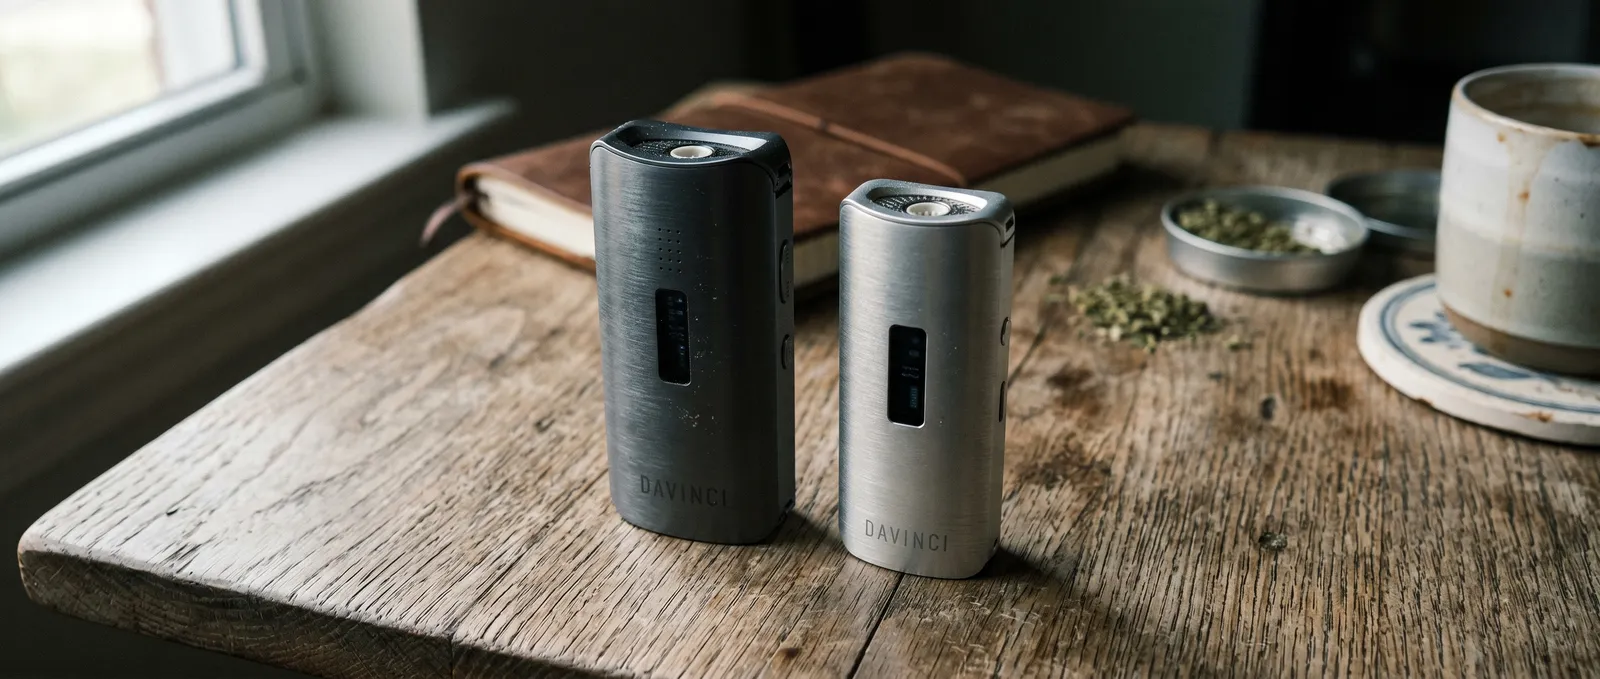
Once cool, tap the chamber upside down over a bin or tray to empty spent herb. Use the included brush (or a dry cotton bud) to sweep out any remaining material. For conduction vaporizers like the PAX 3 or DaVinci IQ2, the oven walls tend to hold onto a thin film of residue — a quick dry brush now makes the deeper clean much easier later.
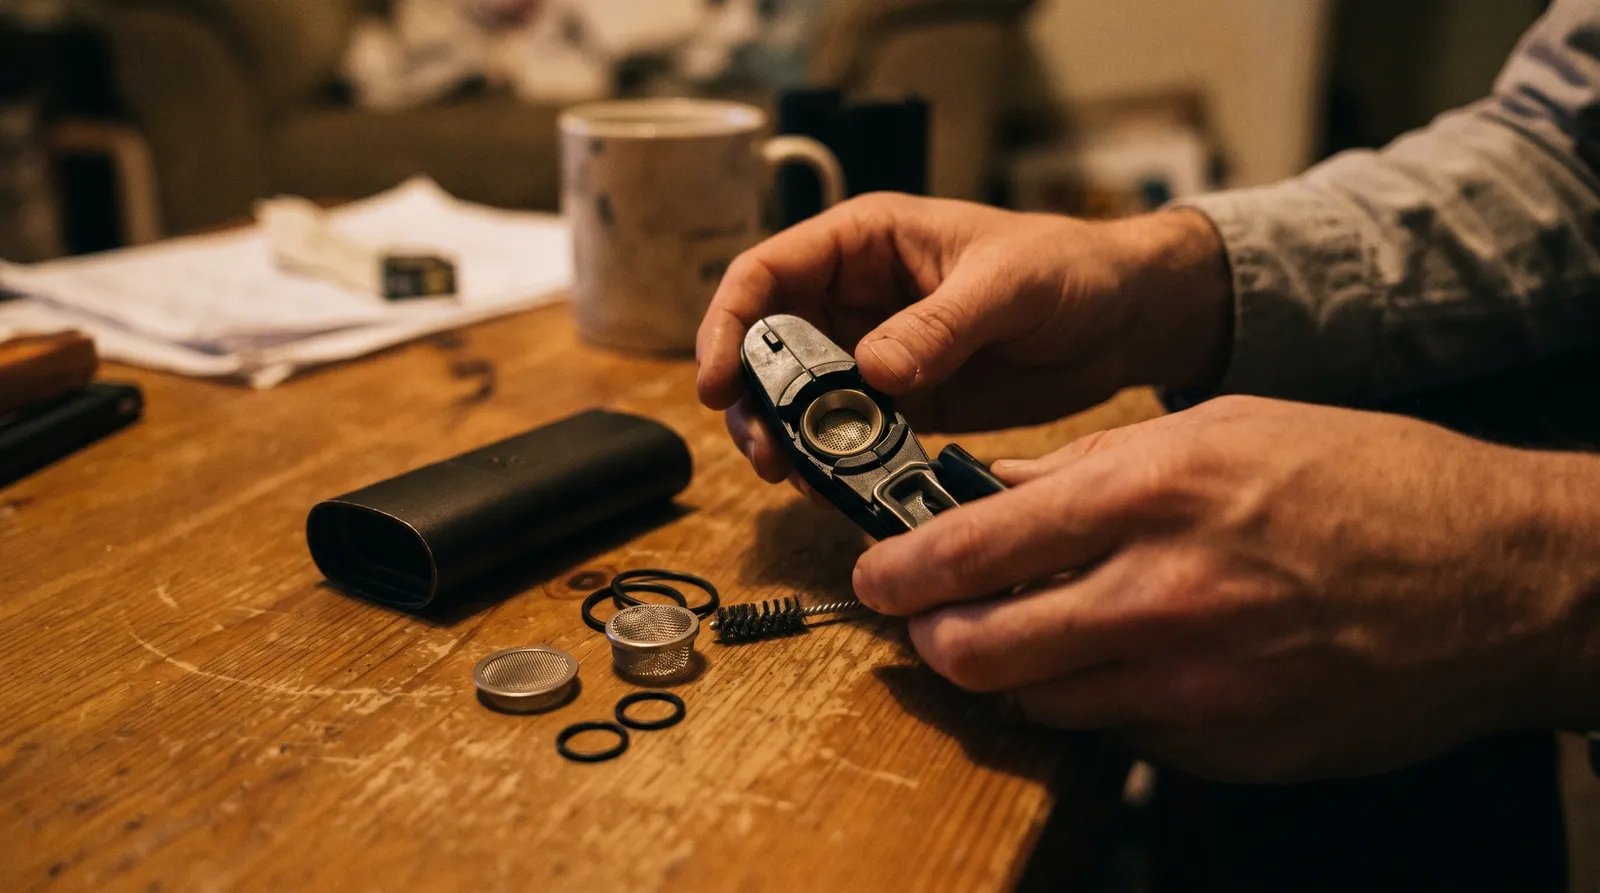
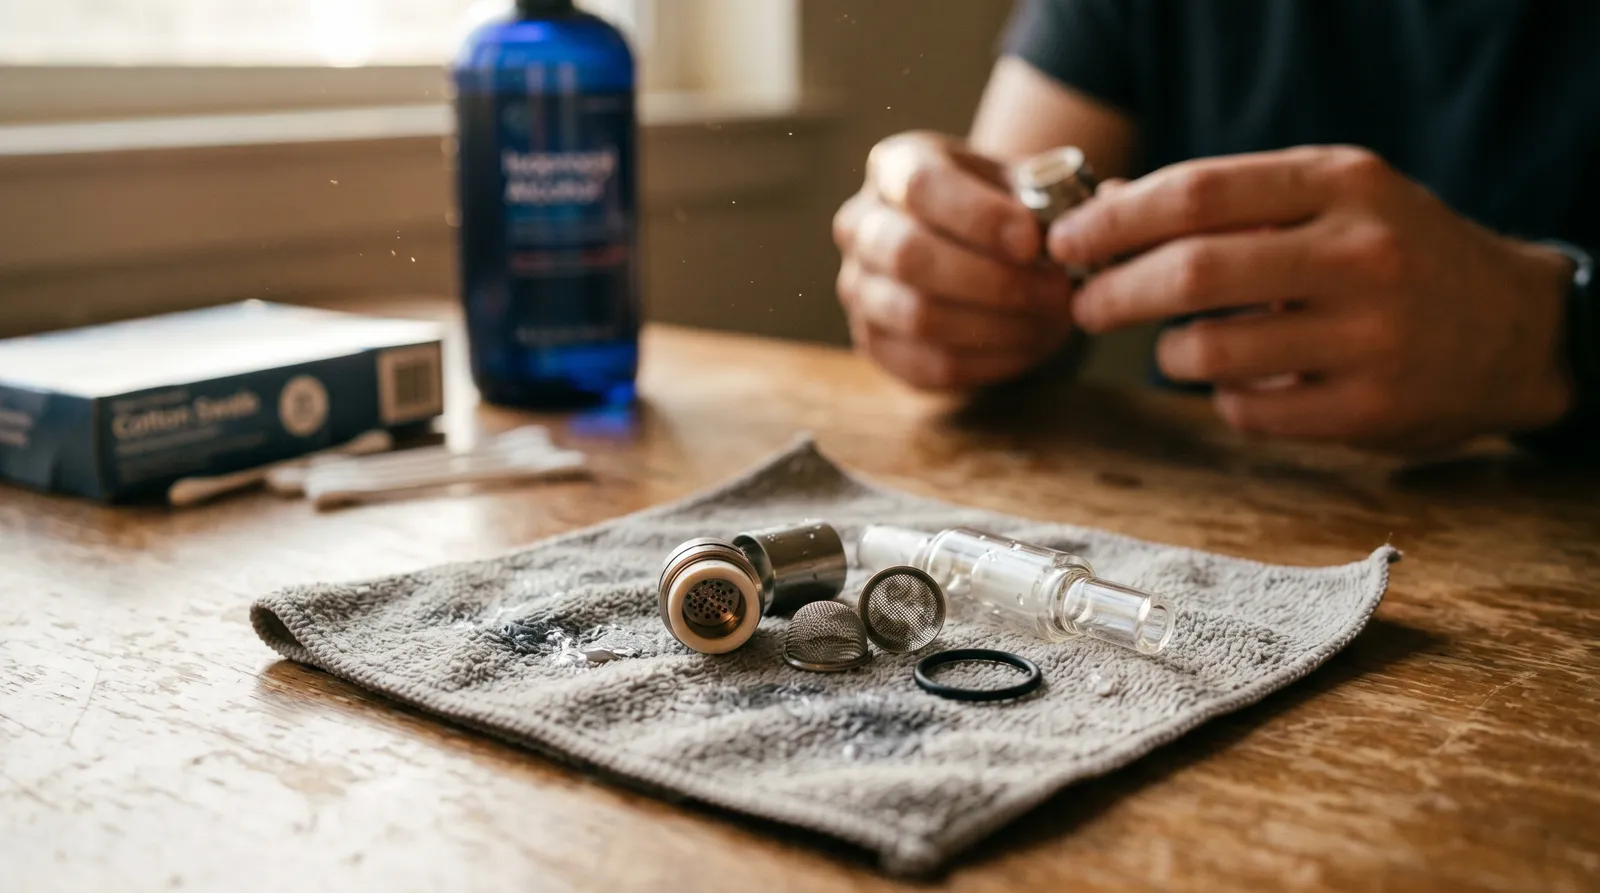
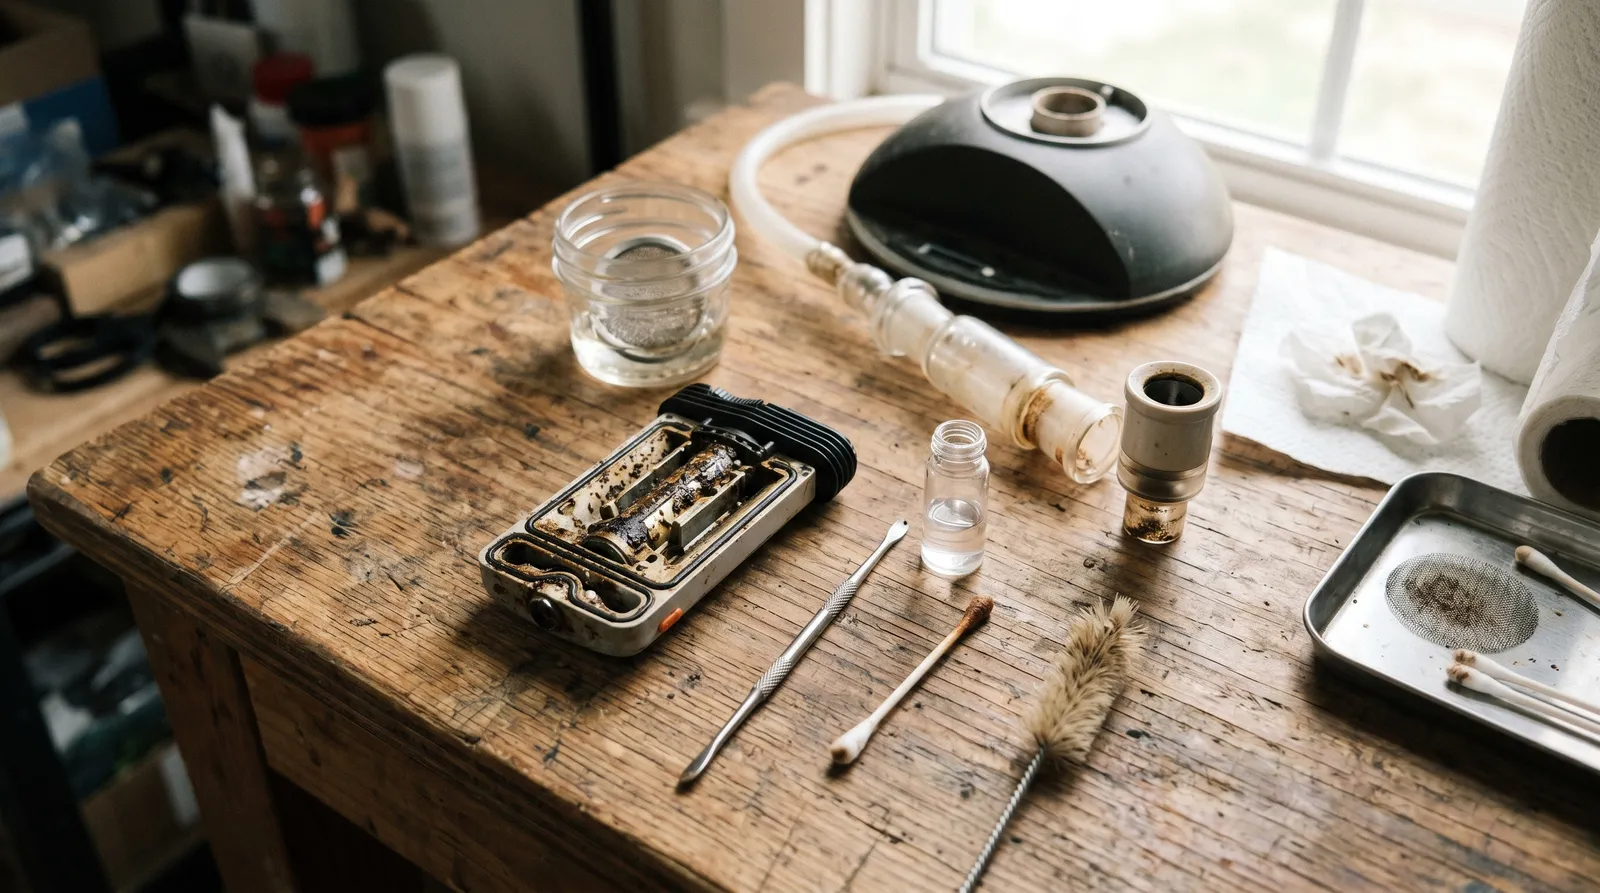
Step 2 — Disassemble All Removable Parts
Every removable component should come off before any liquid touches your device. Pull apart everything the manufacturer designed to come apart. Mouthpieces, screens, cooling units, glass stems, O-rings, dosing capsules — all of it. If you're not sure what's removable, check the manual. Forcing a component that isn't meant to detach is a fast track to a warranty claim.
Here's where devices differ:
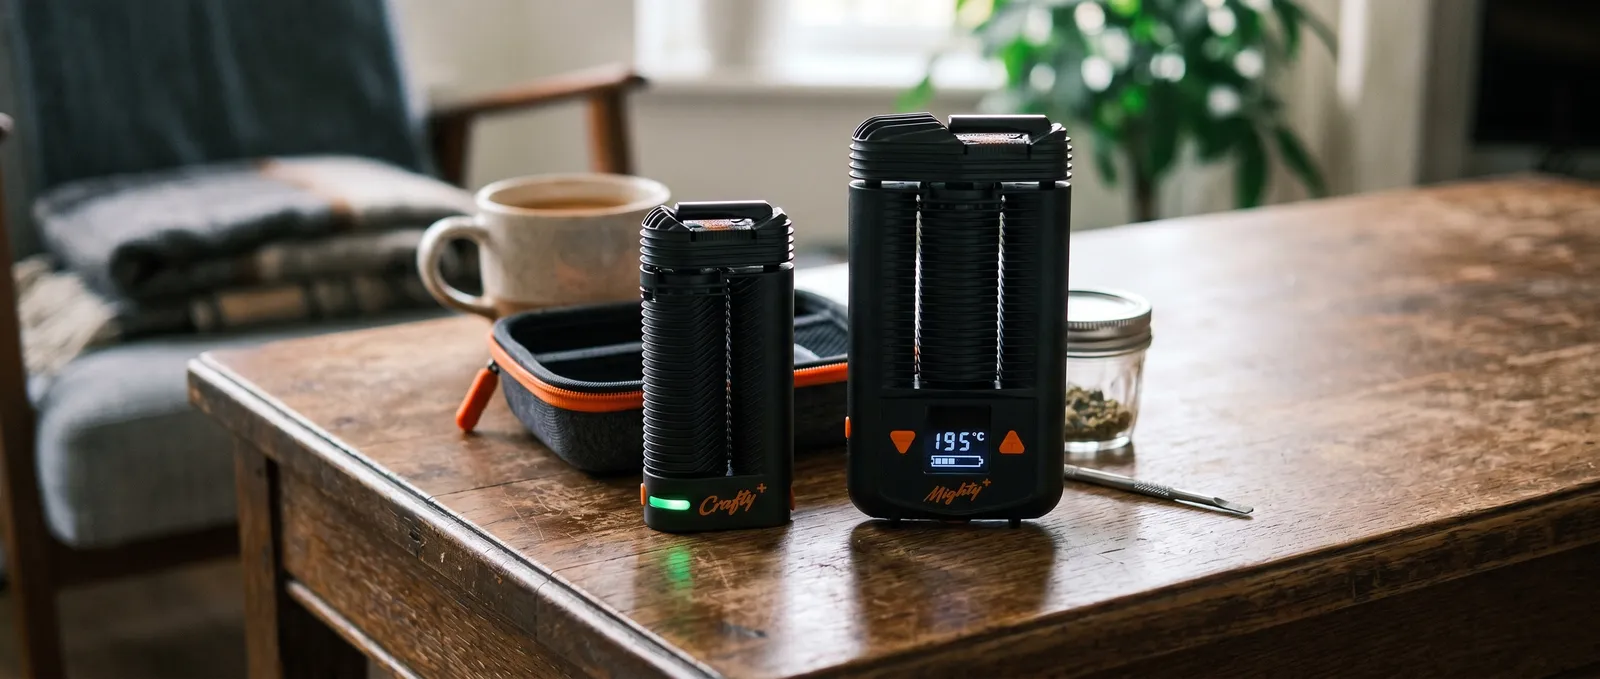
- Storz & Bickel Crafty / Mighty: The cooling unit on top is the main culprit for resin build-up. It twists off and disassembles into several pieces — the blue seal, the locking ring, and the mesh screens. All of these soak well.
- Arizer Solo / Air / ArGo: The glass stems are the vapour path. They collect visible honey-coloured residue inside. Pop them out gently.
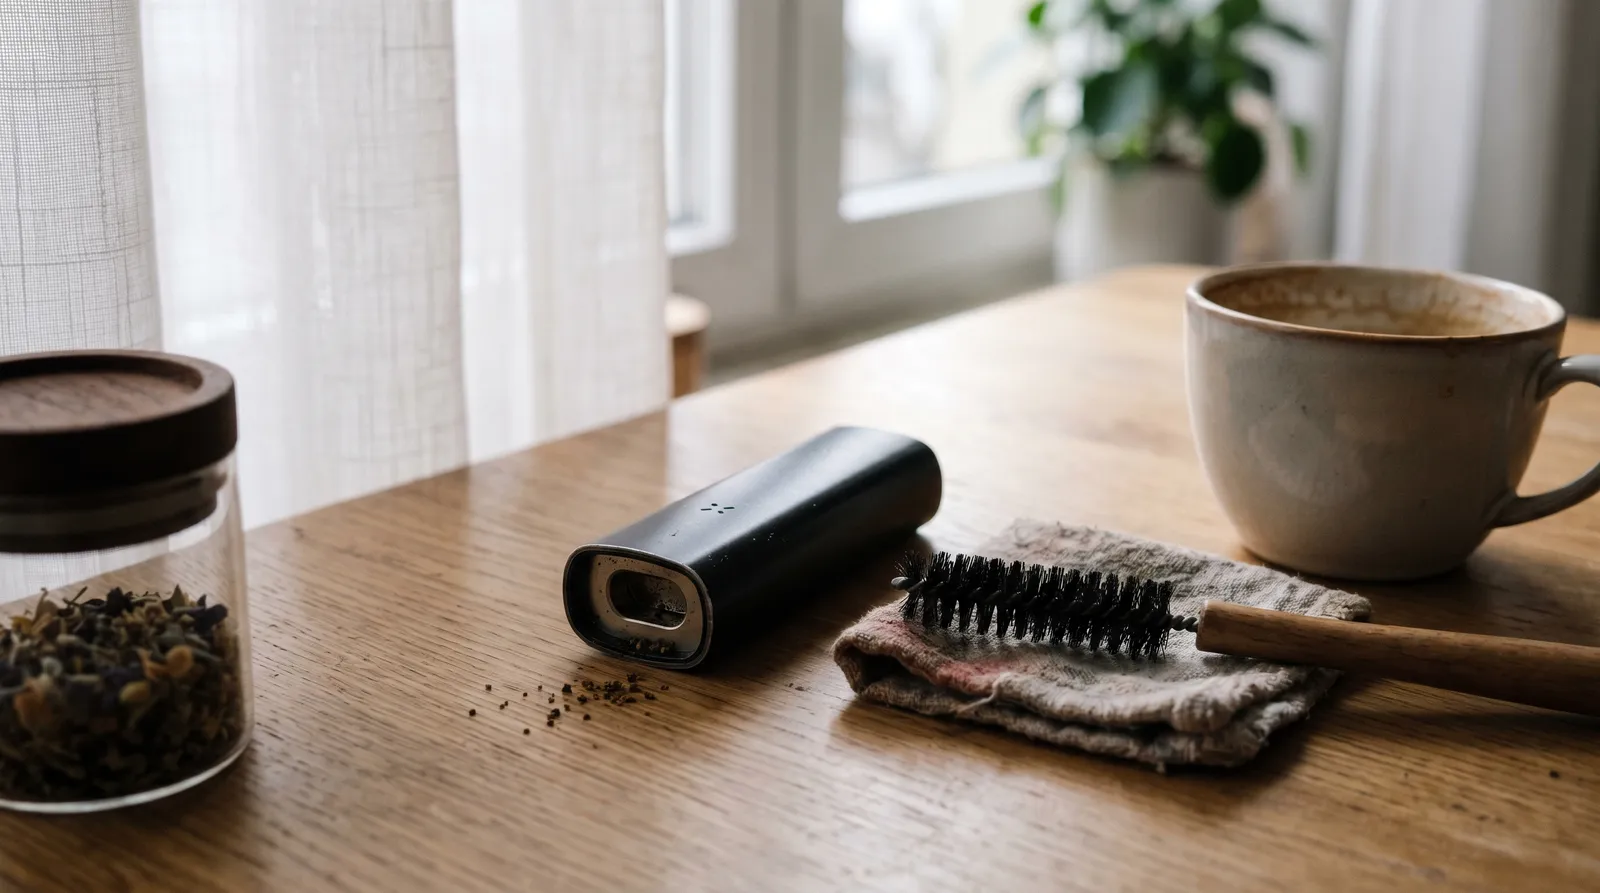
- PAX 3: The mouthpiece, oven lid, and screen all come off. The vapour path itself runs through the body, which you can't submerge — that gets a different treatment.
- DynaVap: The cap, tip, condenser, and O-rings all separate. Being fully mechanical with no electronics, the DynaVap is actually the easiest device to deep-clean.
- Desktop units (Volcano, Arizer Extreme Q): Focus on the valve system or whip tubing, the screens, and any glass components. The base unit itself rarely needs more than a wipe-down.
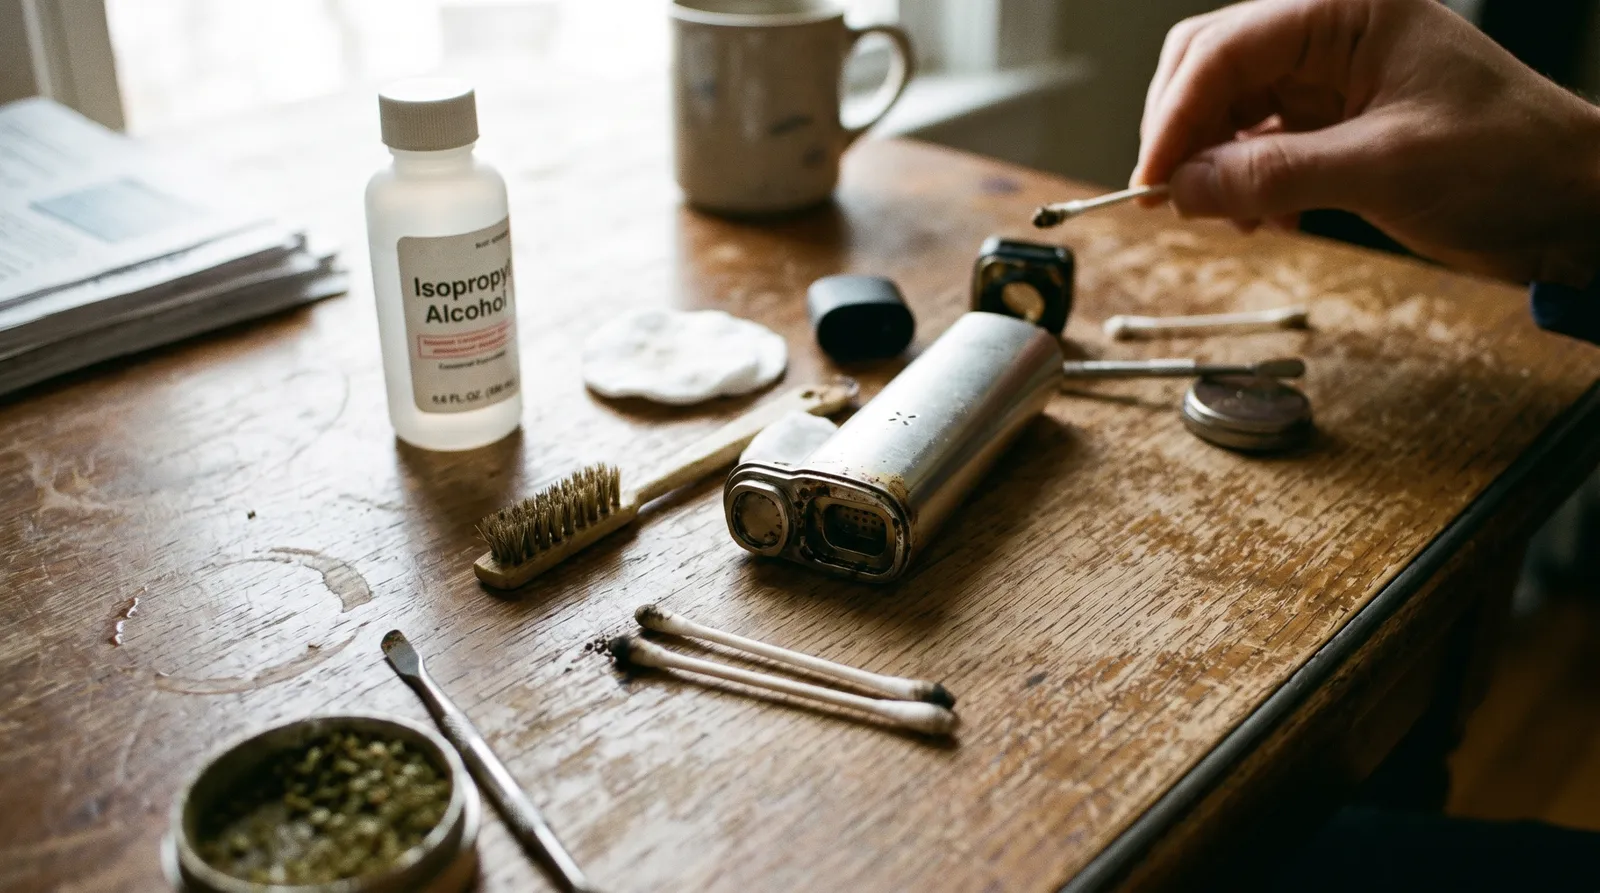
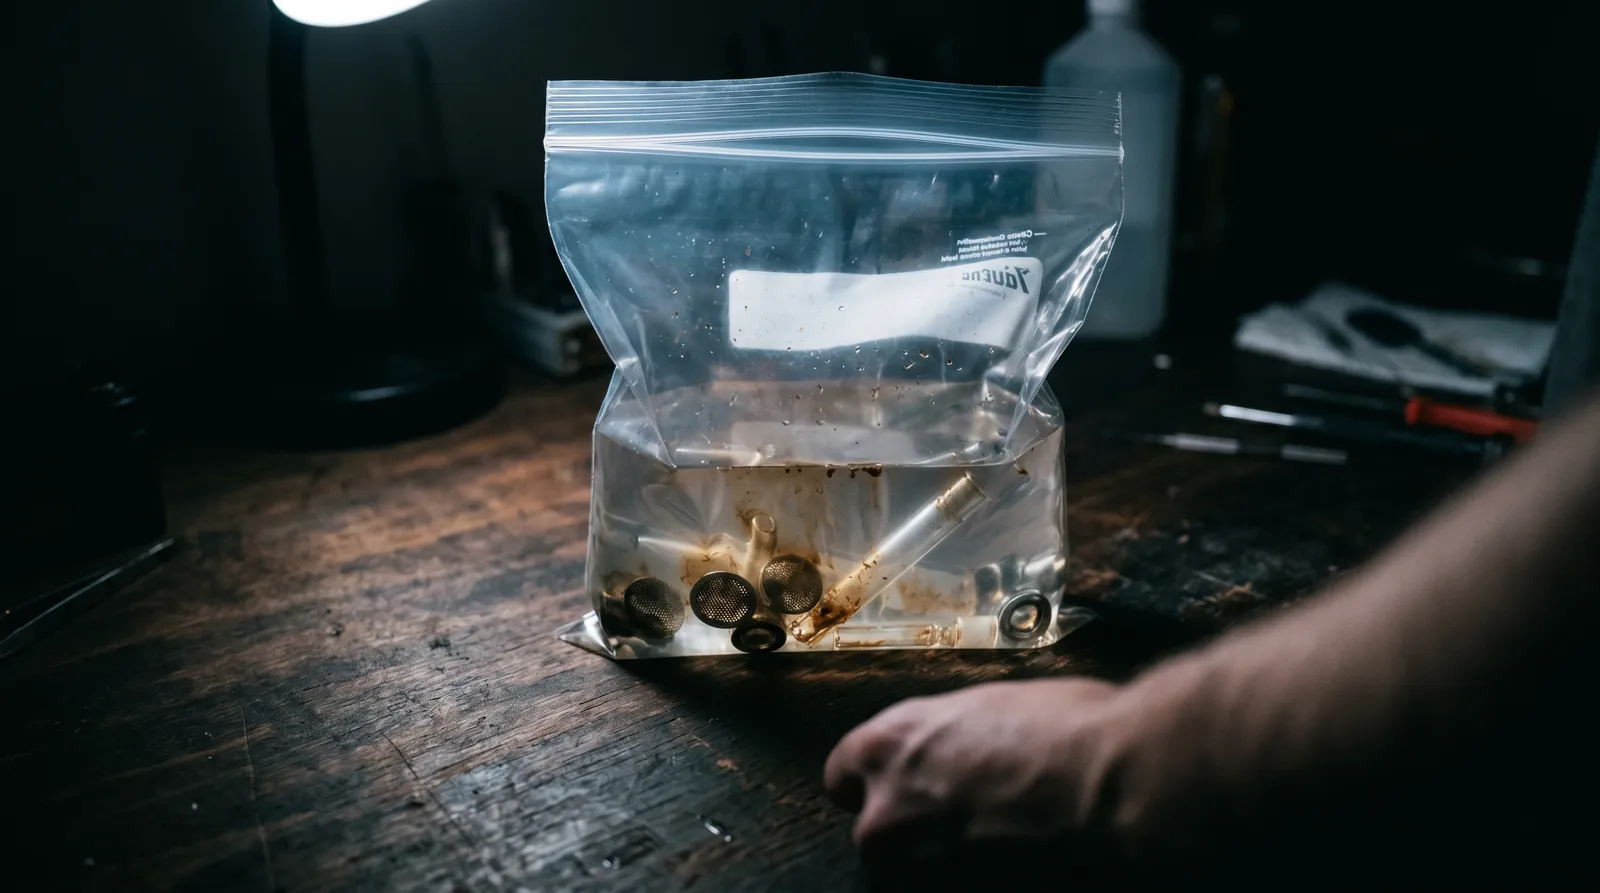
Step 3 — Soak Metal and Glass Components
Submerging non-electronic parts in isopropyl alcohol is the most effective way to dissolve resin. Drop your metal screens, glass stems, and any other non-plastic, non-rubber parts into a resealable bag with enough isopropyl alcohol to cover them. Seal it, give it a gentle shake, and leave it for 20–30 minutes. Heavily gunked parts might need an hour.
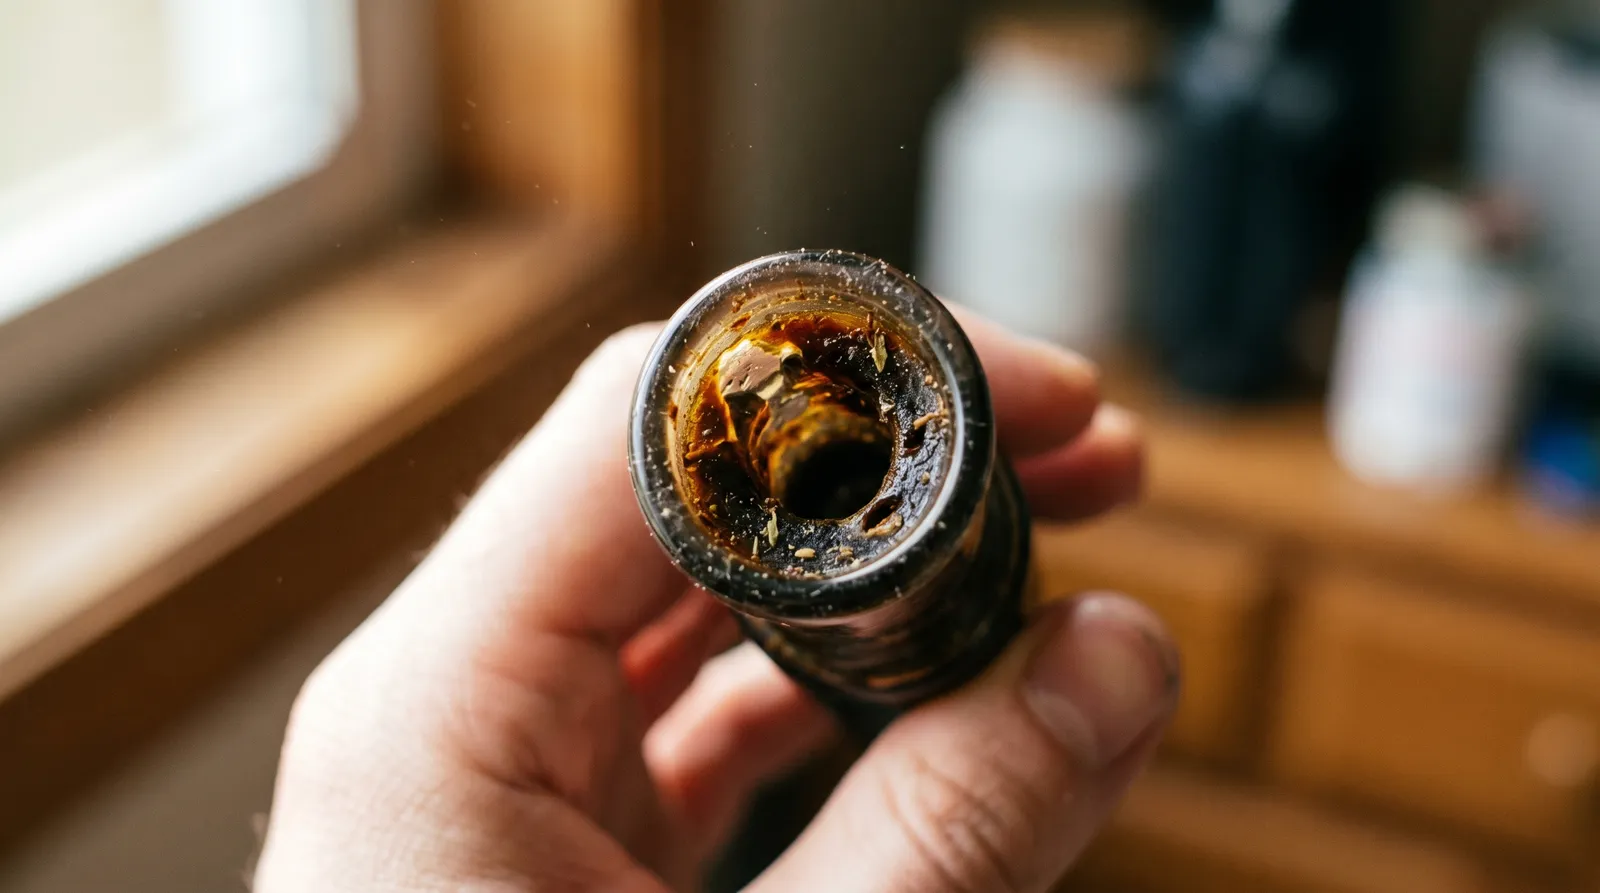
Arizer glass stems are a good example of why soaking works so well. That golden residue inside the tube dissolves beautifully in iso — you'll see the alcohol turn amber within minutes. After soaking, run a pipe cleaner through the stem a few times, rinse with warm water, and let it air dry completely.
For Storz & Bickel cooling units, the soak loosens the sticky resin that accumulates between the fins. After soaking, use a cotton bud to get into the grooves. The screens might need a light scrub with a brush if they're particularly clogged.
A note on the DynaVap condenser: it soaks perfectly in iso, and a pipe cleaner pushed through the tube clears it out in seconds. Some users save the reclaim from the condenser — that's a personal choice, but it shows just how much residue accumulates in a vapour path over time.
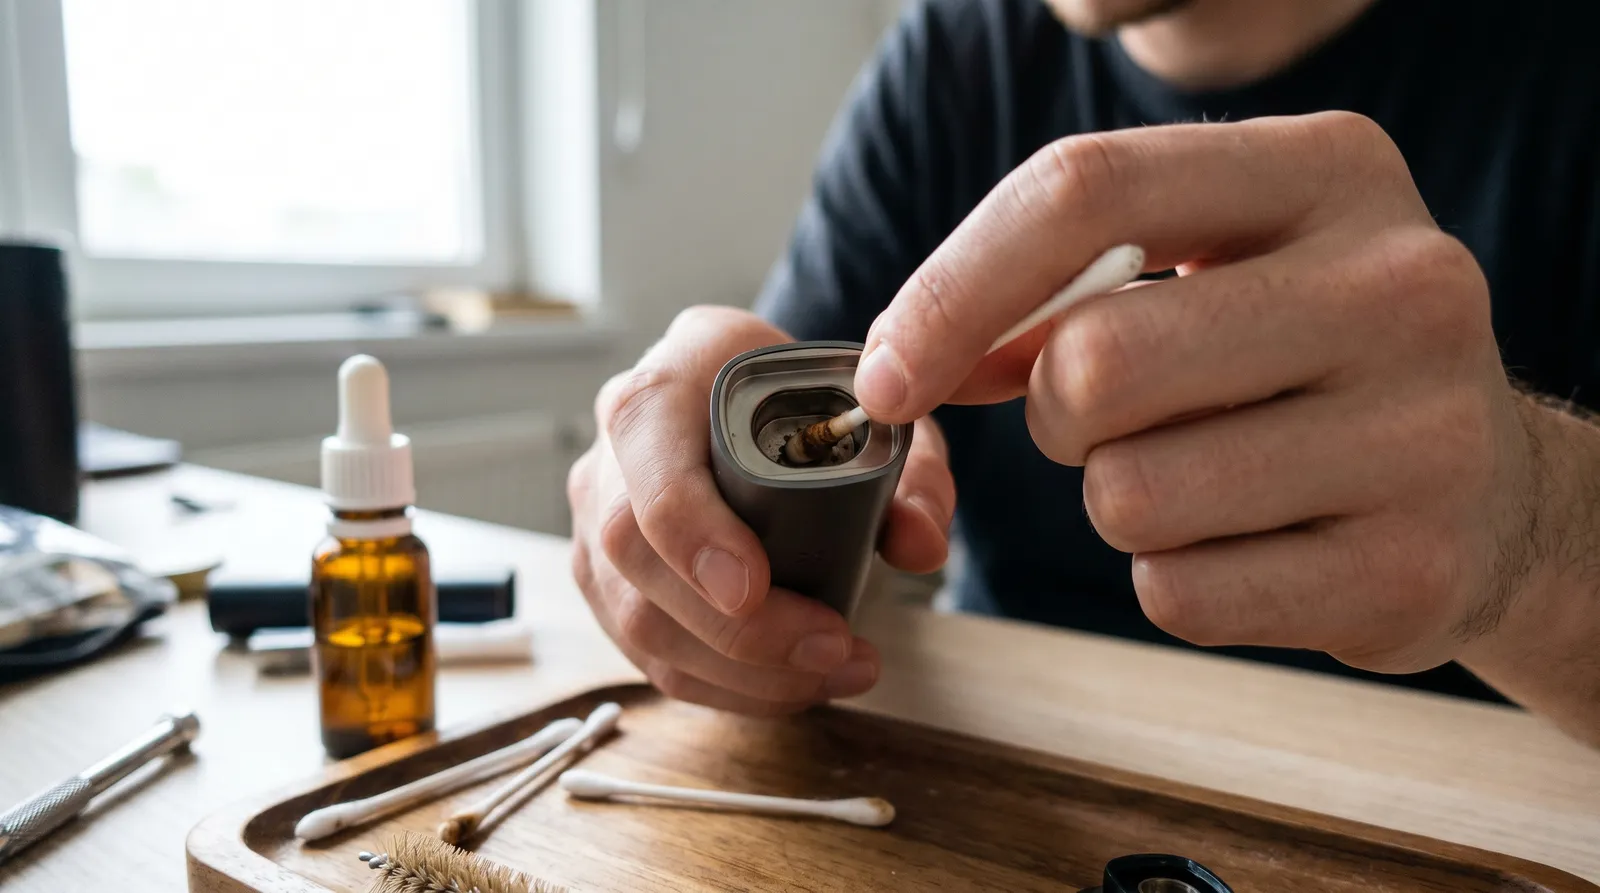
Step 4 — Clean the Oven Chamber and Vapour Path
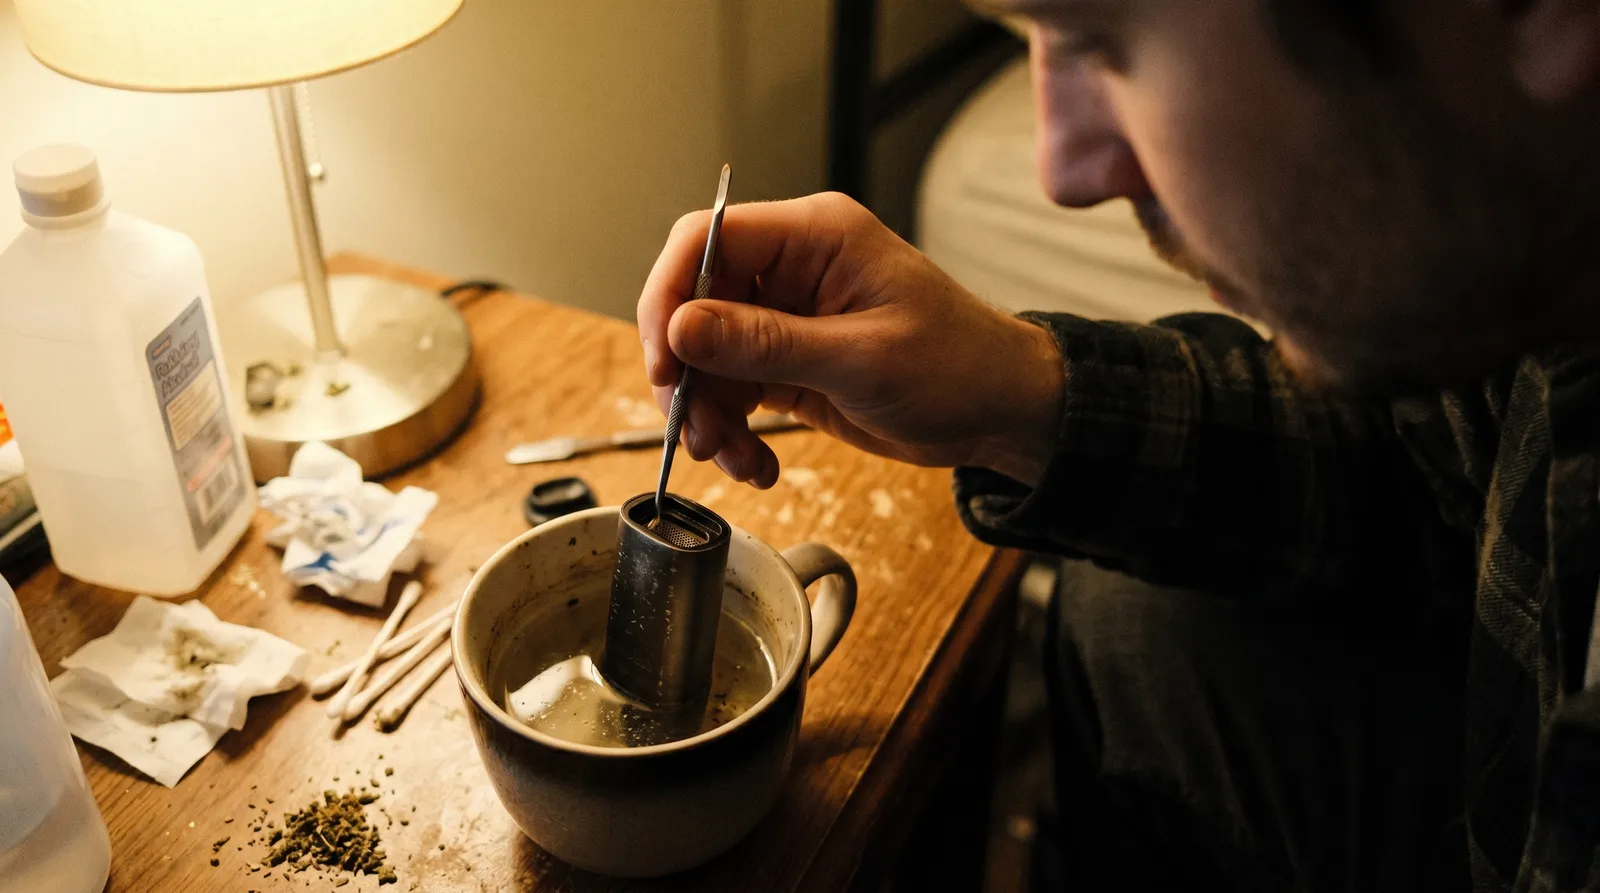
The chamber clean is the step that makes the biggest difference to flavour. Dip a cotton bud in isopropyl alcohol — not dripping wet, just damp — and swab the inside of the heating chamber. For conduction ovens (PAX 3, DaVinci IQ2, Boundless CFC), work the bud around the walls and base in circular motions. You'll see the cotton turn brown. Keep going with fresh buds until they come out clean or nearly so.
For convection-dominant devices like the TinyMight or Arizer portables, the chamber itself stays relatively clean because the herb sits in a separate stem or basket. Focus instead on the area where the stem meets the heater — residue collects at that junction.
The vapour path on devices like the PAX 3 is a narrow channel running through the body. Storz & Bickel include pipe cleaners with the Crafty and Mighty specifically for this. Thread one through, damp with iso, and pull it back and forth a few times. For the PAX, the included pipe cleaners or a thin wire brush pushed through from mouthpiece to oven does the job.
Step 5 — Handle Rubber and Plastic Parts Carefully
Rubber and plastic components need warm soapy water rather than iso. O-rings, silicone mouthpieces, and plastic housings respond well to a 10–15 minute soak in warm water with a drop of washing-up liquid, then a wipe with a cloth or cotton bud.
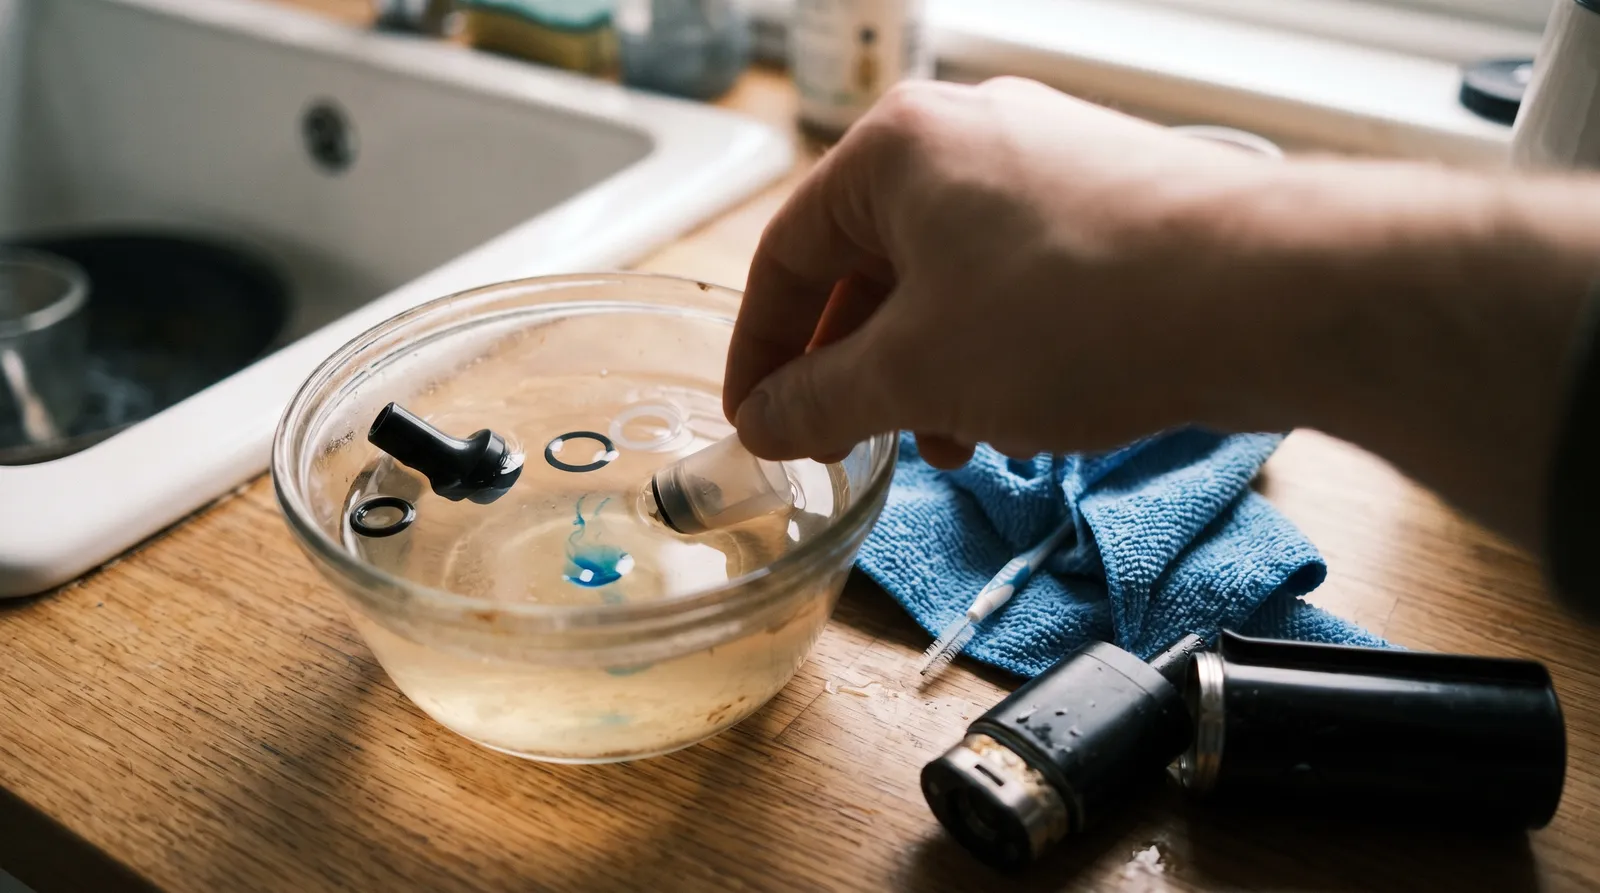
If you must use iso on a rubber O-ring (some manufacturers say it's fine in small amounts), rinse thoroughly with water afterwards and let it dry completely. Iso degrades rubber over time, making seals brittle and less effective. Replacement O-rings are cheap, but a cracked seal mid-session is a pain.
For the XMAX V3 or Flowermate units with plastic mouthpieces, warm soapy water and a pipe cleaner through the airway channel works well. Avoid submerging any part that houses electronics — that should go without saying, but it bears repeating.
Step 6 — Dry Everything Thoroughly, Then Reassemble
Complete drying is non-negotiable before reassembly. Residual isopropyl alcohol left on components will produce an unpleasant chemical taste on your next session, and in the worst case, iso vapour near a heating element is a safety concern. Lay all parts on a paper towel and let them air dry for at least 30 minutes. If you're in a hurry, a hair dryer on a cool setting speeds things up — but never use heat to dry parts that have been in contact with iso.
Once everything is bone dry, reassemble in reverse order. Check that screens sit flat, O-rings are seated properly, and mouthpieces click or twist into place securely. Run a short empty heating cycle (no herb loaded) to burn off any remaining traces of cleaning solution. If you taste anything chemical on the first draw, let it run for another cycle before loading up.
How Often Should You Clean?
Cleaning frequency scales with usage — here's a practical framework that works for most people:
| Task | Frequency | Time Required |
|---|---|---|
| Empty and dry-brush the chamber | After every session | 30 seconds |
| Wipe mouthpiece and screen | Every 3–5 sessions | 2 minutes |
| Iso soak of removable parts | Weekly (daily users) / fortnightly (occasional users) | 30–40 minutes (mostly passive) |
| Full deep clean (chamber, vapour path, all parts) | Monthly | 45–60 minutes |
| Replace screens and O-rings | Every 2–3 months (or when visibly worn) | 5 minutes |
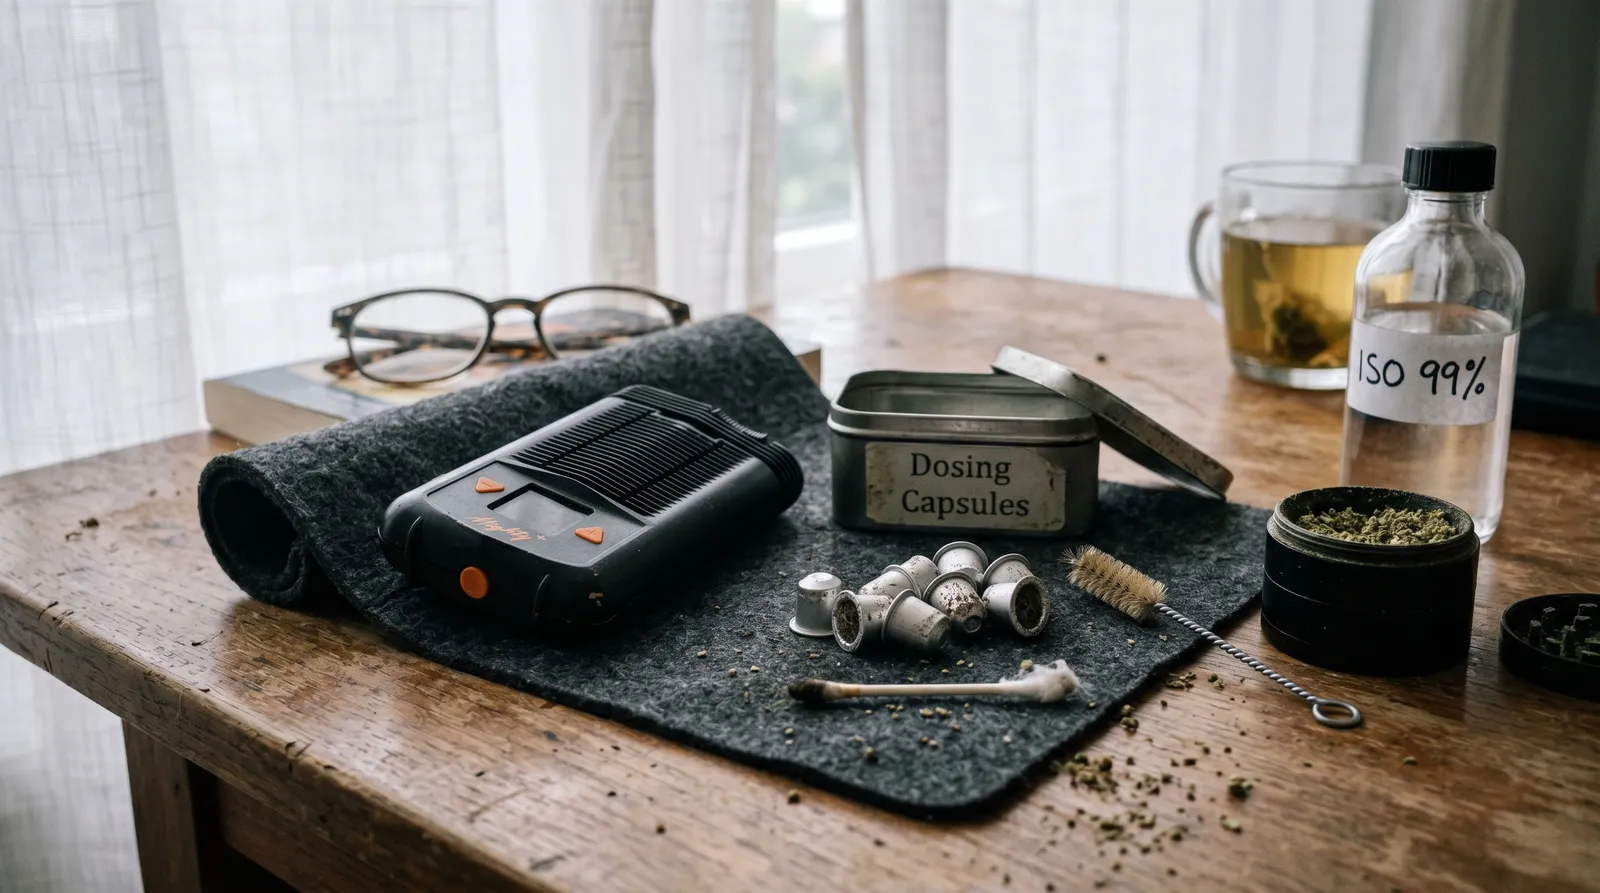
If you use dosing capsules — Storz & Bickel's capsules for the Crafty and Mighty, or stainless steel capsules for compatible devices — your chamber stays dramatically cleaner between sessions. The herb is contained, and the capsule catches most of the residue. It doesn't eliminate the need for cleaning, but it can easily double the interval between deep cleans.
Common Mistakes That Damage Your Device
Most vaporizer damage from cleaning is entirely preventable. A few errors come up repeatedly:
- Submerging electronics. Only fully mechanical devices like the DynaVap can be dunked entirely. Anything with a battery, circuit board, or heating element — keep the body away from liquids. Clean the body with a damp (not wet) cloth or cotton bud only.
- Using abrasive tools on the chamber. Metal scrapers, toothpicks, and stiff-bristle brushes can scratch ceramic and stainless steel heating chambers. Scratches create grooves where residue accumulates faster. Stick to cotton buds and soft brushes.
- Skipping the rinse after iso. Glass and metal parts that soaked in isopropyl need a warm water rinse. Iso residue left on a screen or stem tastes acrid and can irritate your throat.
- Reassembling while still damp. Moisture trapped inside a sealed vapour path breeds bacteria and can corrode metal components. Patience here pays off.
- Using household cleaners. Bleach, vinegar, acetone, window cleaner — none of these belong anywhere near a vaporizer. Isopropyl alcohol and warm soapy water are the only two cleaning agents you need.
What Cleaning Can't Fix
We'd be dishonest if we didn't mention the limits. No amount of scrubbing will restore a screen that's corroded through, a ceramic chamber with deep scratches, or a battery that's degraded from age. If your device tastes off even after a thorough clean, the heating element itself may be failing — particularly in older conduction units where the oven coating wears down after a year or two of heavy use. At that point, you're looking at replacement parts or a new device rather than another soak. Cleaning extends the life of a vaporizer significantly, but it doesn't make it immortal.
A Quick Word on Desktop Units
Desktop vaporizers like the Volcano and Arizer Extreme Q have different cleaning priorities than portables. The heating element and base unit rarely need attention beyond an occasional exterior wipe. The parts that get dirty are the valve bags, whip tubing, and glass components.
Volcano valve bags are technically replaceable consumables — once a bag gets cloudy with residue and starts tasting stale, swapping it for a fresh one is often easier than cleaning. You can buy replacement Volcano bags and valve sets from most headshop stockists. The valve housing and screens, though, benefit from the same iso-soak routine described above.
Whip-style desktops (Arizer Extreme Q, V-Tower) accumulate residue inside the silicone or PVC tubing. Running a pipe cleaner dipped in iso through the whip works for light build-up. For heavier residue, fill the tubing with iso, plug both ends, and let it soak. Rinse thoroughly with warm water afterwards — tubing holds onto iso longer than glass or metal does, so give it extra drying time. Some users replace whip tubing every few months rather than cleaning it, which is a perfectly reasonable approach given how inexpensive replacement tubing is.
Portable vs Desktop: How Cleaning Compares
Portable vaporizers need more frequent cleaning than desktops, mainly because their vapour paths are shorter and narrower, so residue concentrates faster. A Mighty's cooling unit can clog noticeably after a week of heavy use, while a Volcano's valve housing might go a month before needing attention. Desktop glass components — the Extreme Q's elbow adapter and cyclone bowl, for example — are also easier to soak because they're larger and more accessible. On the other hand, portables benefit from dosing capsules in a way desktops generally don't, which can level the playing field. If you own both types, the most practical approach is to clean your portable weekly and your desktop monthly, adjusting based on how heavily you use each.
Signs You've Left It Too Long
Restricted airflow is the most reliable early warning sign. If you're noticing any of these, it's time to stop procrastinating:
- Restricted airflow — you're drawing harder than usual for less vapour.
- Off-taste — a burnt, stale, or harsh flavour that wasn't there when the device was new.
- Visible residue — dark build-up on screens, stems, or inside the mouthpiece.
- Uneven heating — some herb getting charred while the rest stays green, often caused by blocked airflow changing how heat distributes through the chamber.
- The device runs hotter than expected — the heater compensating for restricted airflow, which also accelerates battery drain on portables.
According to a maintenance study published in the Journal of Aerosol Science, particulate build-up in vapour delivery systems reduces both efficiency and consistency of aerosol delivery over time (Lanz et al., 2016). In plain terms: a dirty vaporizer wastes your herb because it can't heat it properly.
Keeping Things Clean Between Deep Cleans
The 30-second post-session brush-out prevents about 70% of the gunk that leads to a painful deep clean later. A few other habits help:
- Don't pack the chamber too tightly. Overpacking restricts airflow and pushes herb particles into the vapour path.
- Use a medium grind. Too fine and particles slip through screens; too coarse and you get uneven extraction with more residue left behind. A 4-part grinder from SLX or Santa Cruz Shredder gives a consistent medium grind that works well across most devices.
- Store the device upright when cooling down. Gravity pulls residue downward rather than letting it coat the mouthpiece and upper vapour path.
- Consider dosing capsules if your device is compatible with them — they're the single most effective way to keep a chamber clean with zero extra effort.
Last updated: April 2026
Veelgestelde vragen
12 vragenCan I use rubbing alcohol to clean my vaporizer?
How often should I deep clean my vaporizer?
Do dosing capsules keep my vaporizer cleaner?
Can I clean my DynaVap differently from electronic vaporizers?
Why does my vaporizer taste bad even after cleaning?
Is it safe to use household cleaners on a vaporizer?
Where can I get replacement screens and O-rings for my vaporizer?
Can I clean a vaporizer with just warm water?
How do I know when to replace my vaporizer screens?
What's the best way to clean a vaporizer mouthpiece?
Can I order cleaning supplies specifically made for vaporizers?
Does cleaning my vaporizer improve battery life?
Over dit artikel


Adam Parsons is an external cannabis and psychedelics writer and editor who contributes to Azarius's wiki as both author and reviewer. On the writing side, he authors Azarius's kratom and kanna clusters, drawing on exten
Dit wiki-artikel is opgesteld met hulp van AI en gecontroleerd door Adam Parsons, External contributor. Redactioneel toezicht door Joshua Askew.
Medische disclaimer. Deze inhoud is uitsluitend bedoeld ter informatie en vormt geen medisch advies. Raadpleeg een gekwalificeerde zorgverlener voordat je een stof gebruikt.
Laatst beoordeeld op 26 april 2026
Gerelateerde artikelen

Storz & Bickel Volcano complete guide
De Volcano is een desktop convectie-vaporizer van Storz & Bickel die losse ballonnen vult met damp via heteluchtextractie. Hazekamp et al.
TinyMight, Boundless en XMAX vergeleken: specs en advies
Een vergelijking van zes draagbare droogkruidvaporizers van drie merken: TinyMight 2, Boundless CFC en CFX, en XMAX V3, Starry en Ace.
Vaporizer schoonmaken: complete gids voor elke vape
Een vaporizer schoonmaken is een eenvoudige onderhoudsroutine die je apparaat fris laat smaken, soepel laat trekken en jaren langer laat meegaan.
Arizer portable lineup vergeleken: Solo, Solo 2, Solo 3 en ArGo
De Arizer portable lineup vergeleken is een zij-aan-zij-analyse van vier draagbare glassteamvaporizers — Solo, Solo 2, Solo 3 en ArGo — die dezelfde…
Storz & Bickel Crafty vs Mighty – Vergelijking
De Storz & Bickel Crafty en Mighty zijn hybride conductie-convectie vaporizers uit dezelfde Duitse fabriek met identieke kamergeometrie, koelelement en…

DynaVap complete guide — handleiding voor beginners
Een DynaVap is een compacte, handmatige droogkruidvaporizer zonder batterij of elektronica.
PAX Vaporizer Lineup Guide — PAX 3, Mini & Flow vergeleken
De PAX vaporizer lineup guide vergelijkt de drie huidige draagbare PAX-modellen — PAX 3, PAX Mini en PAX Flow — op verhittingsmethode, ovencapaciteit…
Portable vs desktop vaporizer: koopgids en vergelijking
De keuze tussen een portable en een desktop vaporizer draait om hoe en waar je dampt.
DaVinci IQ vs MIQRO: verschil in specs en gebruik
De DaVinci IQ en MIQRO zijn conductie-vaporizers voor droge kruiden met een damppad van zirkoniumoxide-keramiek en een temperatuurbereik van 177–222 °C. Het…